Connect Claude
A step-by-step walkthrough for adding StrategyTune to Claude as a custom connector — with screenshots of every screen.
Claude supports custom connectors on all paid plans. You add the connector once in your Claude account settings, and it becomes available in Claude everywhere you use it — web, desktop, and mobile apps.
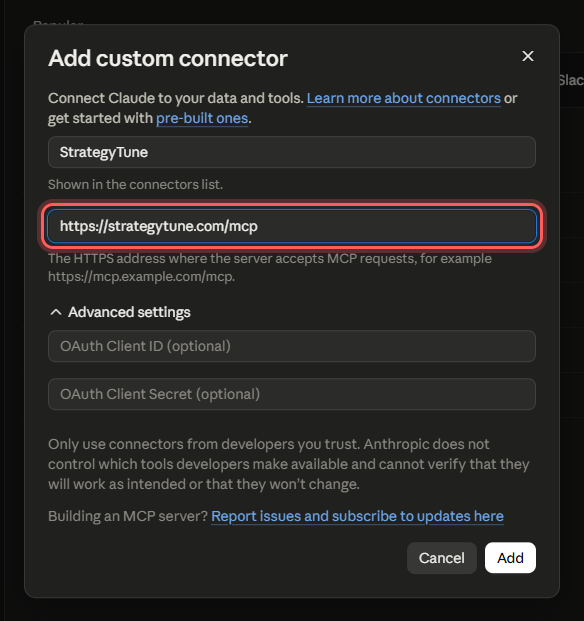
The only thing you need is the StrategyTune connector URL:
https://strategytune.com/mcpStep 1 — Open the Connectors settings
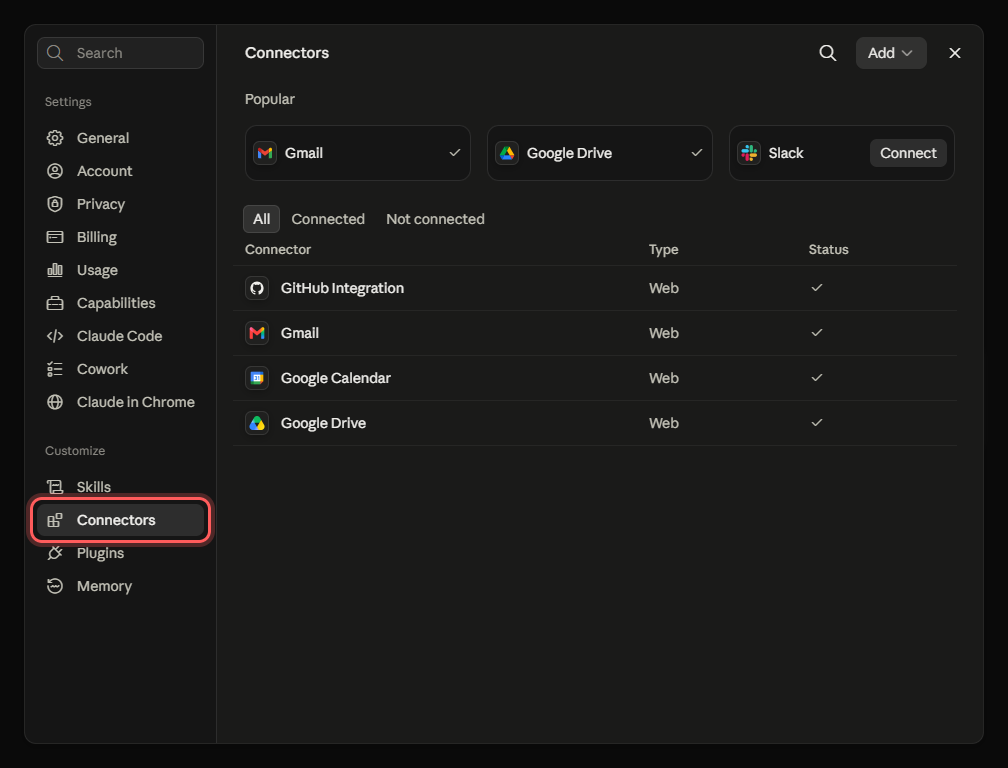
In Claude, open Settings and pick Connectors in the left sidebar — it lives under the Customize group.
Step 2 — Add a custom connector
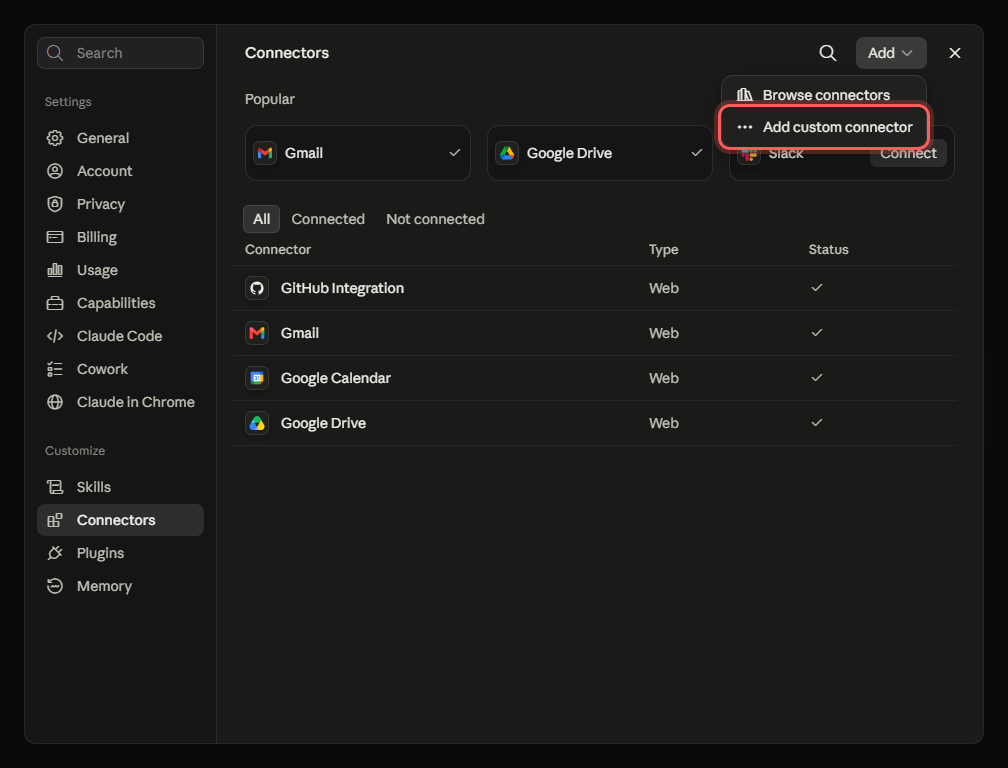
Click Add in the top-right corner and choose Add custom connector.
Fill in the dialog: any name you like (e.g. StrategyTune) and the connector URL. Leave the OAuth fields under Advanced settings empty — StrategyTune handles sign-in automatically. Click Add.
Step 3 — Connect and approve access
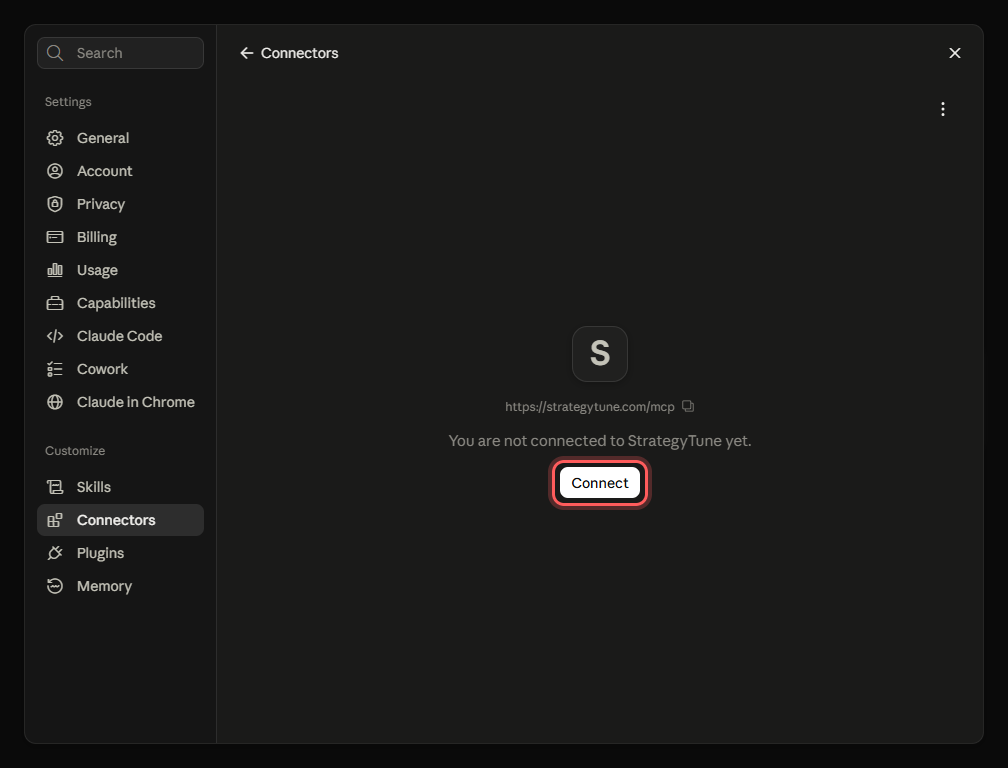
Open the StrategyTune connector you just added. If it doesn't say Connected yet, click Connect.
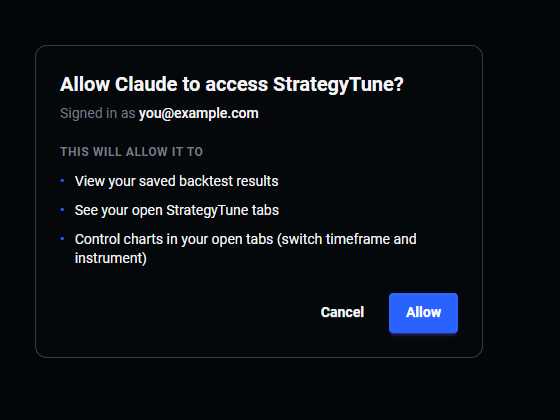
Claude sends you to strategytune.com: sign in to your StrategyTune account if you aren't already, review what access Claude gets, and click Allow. You're returned to Claude automatically.
Step 4 — Review tool permissions
Once connected, the connector page lists every StrategyTune tool, grouped into read-only tools and write/delete tools. This is where you decide how much Claude may do without asking.
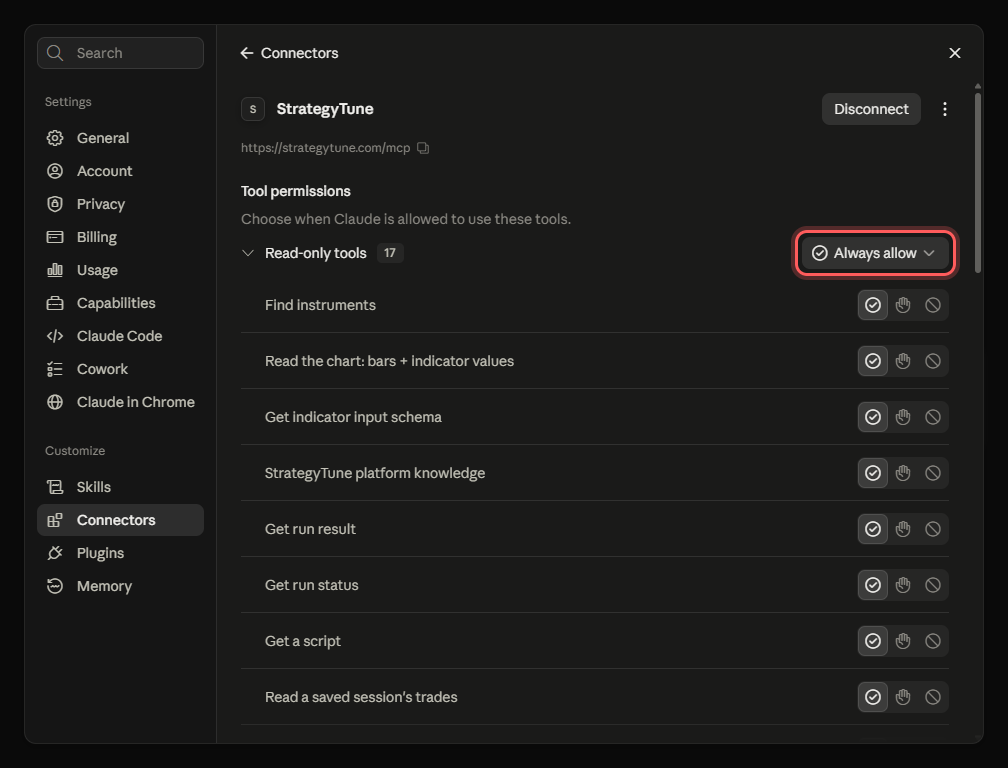
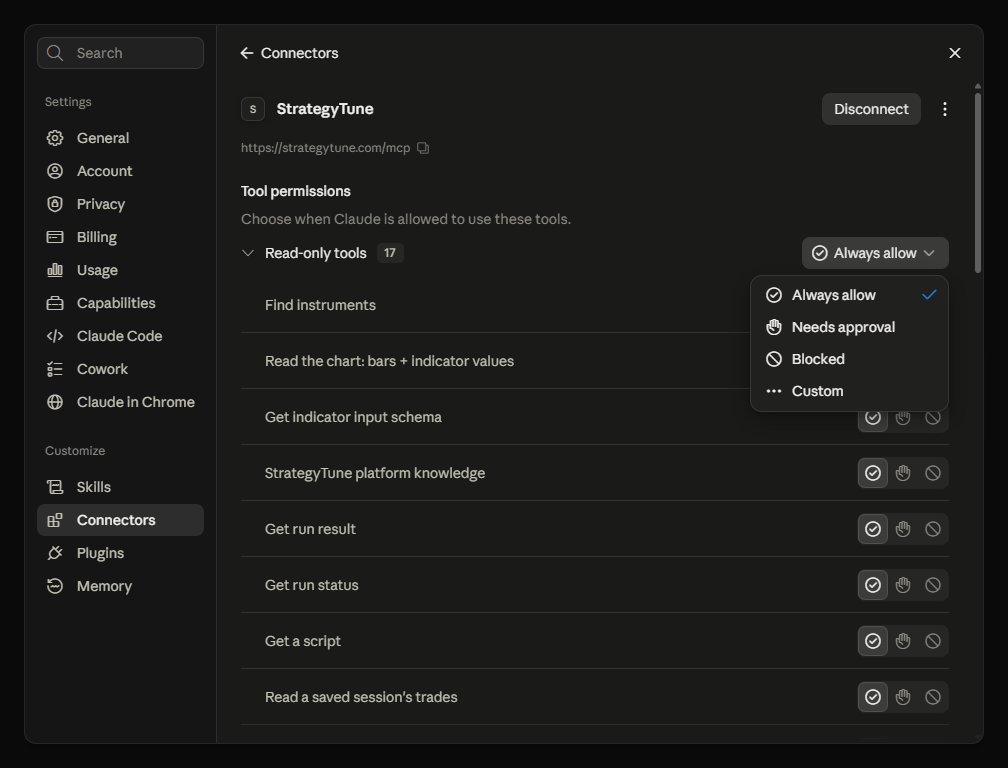
Each group (and each individual tool) can be set to Always allow, Needs approval, or Blocked — or Custom for per-tool control within a group. A sensible setup: leave read-only tools on Always allow, and use Needs approval for write/delete tools if you want to confirm changes (script saves, deletions, chart changes) before they happen.
Step 5 — Use it in a chat
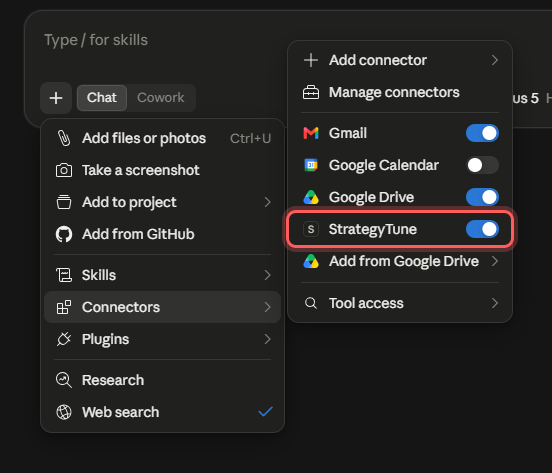
In any chat, the connector is available right away. You can check or toggle it via the + button in the message box → Connectors. Then just ask — for example "Use StrategyTune to list my open tabs" or "Backtest a simple RSI strategy on EURUSD 15m".
Disconnecting or removing
On the connector page, Disconnect revokes Claude's access to your StrategyTune account, and the ⋮ menu → Remove deletes the connector from Claude entirely. You can also revoke access from the StrategyTune side at any time in Settings → Connected AI — disconnecting there takes effect immediately.
Reconnecting is instant. If you remove the connector and add it again later, Claude may reconnect without asking you to sign in again — that's normal. To fully cut access, use Disconnect in StrategyTune's Settings → Connected AI.
For what your AI can do once connected, see What your AI can do. For other clients (ChatGPT, Claude Code, Codex), see Connect your AI.
Something missing or wrong? Email support@strategytune.com.